
Email Setup - Windows Live Mail
Windows Live Mail is the default email program included with Windows 7 and is available for download on Windows Vista and Windows XP as part of the Windows Live Essentials package. It can be opened by clicking Start, All Programs, Windows Live Mail.
If your Windows Live Mail is already set up, but you are recieving a "Mailbox Quota Exceeded" Message:
This will remove any messages saved on the server which are filling up your mailbox.
Step 1.
Windows Live Mail 2011
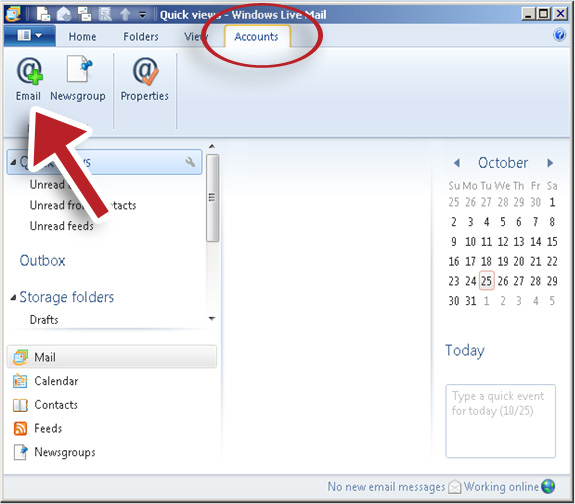
Click Accounts on the top.
Then Click the Email button.
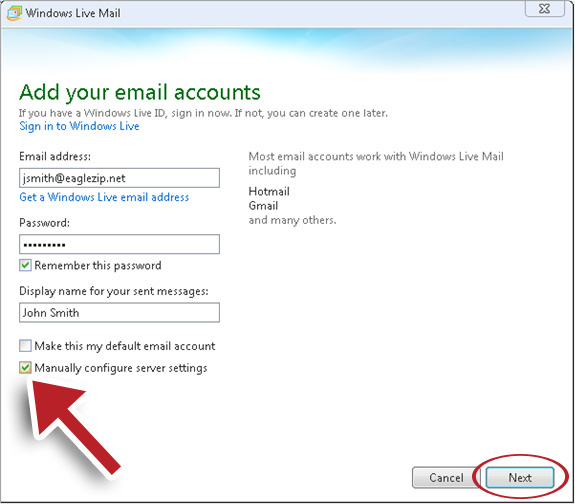
Type in your EagleZip email address (or your domain-based e-mail address for hosting accounts) and password along with a display name.
Select Manually configure server settings.
Click Next.
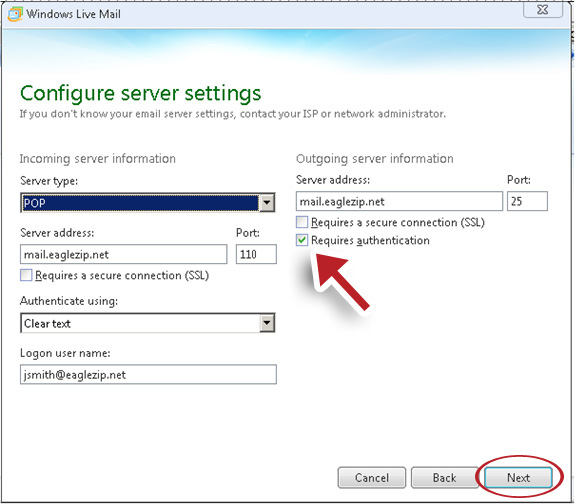
Configure server settings:
Incoming Server Information
- Server type: POP
- Server address: mail.eaglezip.net (or mail.yourdomain.com for hosting accounts)
- Port: 110
- Authenticate using: Clear text
- Logon user name: Your full email address - Example: jsmith@eaglezip.net
Outgoing Server Iinformation
- Server address: mail.eaglezip.net (or mail.yourdomain.com for hosting accounts)
- Port: 25
- Requires Authentication: Selected (should have a check mark)
Click Next.
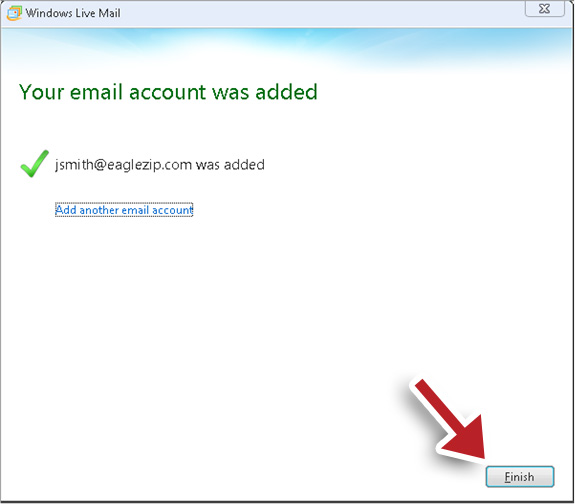
You will be presented with this screen.
Click Finish.
Step 2. DO NOT SKIP THIS STEP
We need to double check an important setting which can cause issues with your email account.
Under the Accounts tab make sure you have your email address selected (should be highlighted light blue)
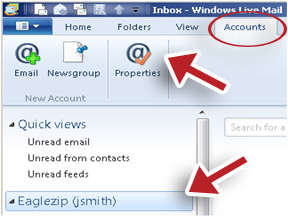
Click on the Properties button.
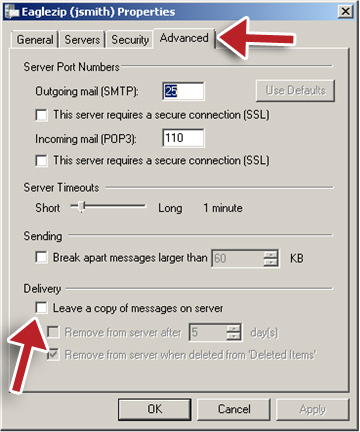
Click on the Advanced Tab.
Under Delivery uncheck “Leave a copy of messages on server”
Click OK.